As I said before, I've been doing a lot of crafting and planning for our Halloween party next month. Yes, it's September and it's over a month away, but I have a LOT planned and everything takes a long time to plan, craft, alter, gather, buy, etc.
I'll try to link back to the original sites where I got the projects, tutorials, or inspiration from, because one of my biggest pet peeves is clicking on a pin on Pinterest, only to find it's a bad link or definitely not where the picture was originally placed on the internets.
aaaaaand... here we go:
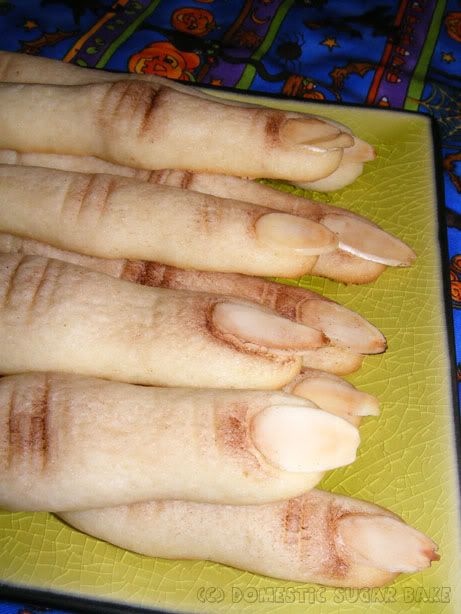
First off we have the party invitations. Erin helped me make the plaster of paris fingers when she came to see me in August. I am so glad she helped me because
the directions from Martha Stewart were completely lacking.
The "mold rubber" I purchased apparently wasn't mold rubber at all. Being a complete newbie with crafts in general, I need very detailed instructions, preferably with brand names included. Erin ended up picking up a kit that you use to make clay figures of your baby's hands and feet, and it worked great! After our fingers were made, I used my
Tim Holtz Craft Knife to perfect the air bubbles and other various imperfections. Then I used a greyish Distress Ink (I think it was Pumice Stone?) and gave the fingers a little deathly color.
The rest was easy, typing up the words, aging with Distress Inks, and burning the edges was a ton of fun. Erin found the boxes at Hobby Lobby in the baking section, and the moss can be found at any craft or superstore.


The biggest project last year and for sure again this year is the apothecary. Last year it was a huge hit and everyone raved at how awesome everything was. It was very stressful for me, mostly because I didn't give myself enough time to do everything, but I knew I had to do it again this year. I've been collecting all sorts of different glass containers throughout the year and this past week I've been altering them to give them more spunk, using
this tutorial. I haven't finished all of them, but I'm making progress and having a ton of fun doing it. I'm also trying to put together what ingredients will go in what container, and what label will go on what container. It's rather a complicated process the way I'm doing it, and I'm doing it this way because I'm super OCD about it being perfect.
I just picked up these awesome bottles at my favorite thrift store, St. Vincent de Paul.
Several weeks ago I put some bottles outside and added a little dirt to the bottom to see if they would turn out aged at all. So far, no cigar. The tin can is a little bit rusty, but I found a much better technique:
These two tin cans were aged with a pint of hydrogen peroxide, 1/4 cup vinegar, and two tablespoons of salt. I mixed the stuff in a plastic container that I got from the dollar store several years ago and never found a use for, and I let the safety pins and cans sit in the mixture overnight. See the tutorial
here.
I also wanted to see what the mixture would do to glass that had been spray painted. This is obviously an out of focus picture, but you can see it didn't get the same effect. Obviously, it's glass, and doesn't quite rust. The mixture foamed up overnight and it dried on the candlestick to give this gross effect. I'd call it a success!
Both of these bottles were spray painted black originally, just painted with acrylic paint on top.
This is a book cover I'm trying to make. Every single book in my house is not the right size, even the two books that I got from the dollar store that I *SWORE* were the right size. *sigh*
The picture frame on the left that I scored at Hobby Lobby for $8 will be on the wall with several other pictures that look something like
this. The book on the right is something I've been working on for a very long time.
This is where I am at this evening. I just finished gluing the tissue paper. I will be adding the coat of white gesso tomorrow.
I have a few plans for altered books....

I sanded and primed the cauldron on the left which I picked up at St. Vincent de Paul for $1.50, and today I had a ton of fun making this goopy mess. I found a half-full bucket of interior/exterior latex paint in the storage room in our basement that the previous owners left. The other day I stopped at the Michigan Lake beach on my way home from work and filled a plastic grocery bag with sand. I have no idea if this is legal, it sounds illegal to me. Anyway, I mixed the paint with a ton of sand and it was so easy. I forgot to put flour in the mixture, so when I thought I was done, I looked at the tutorial again and saw that I missed it. I went back downstairs, added the flour, and re-applied. We'll see how it turns out. The lady from the tutorial said it took a week to cure and she blamed it on not priming. But the material became so thick that I don't think priming will make much of a difference. We'll see.


For my nerd/dork costume, I went to my favorite thrift store, St. Vincent de Paul, grabbed a pair of huge men's pants, an ugly shirt, a clip on tie that I'm sure is for kids, a bright, plastic visor, and suspenders. I spent less than $10 on everything. I picked up a pair of huge black rimmed glasses at the dollar store a few days after Adam took these pictures of me.
The next few photos are piles in my crafting room that are either being prepped for altering, or are sitting and waiting for the day when they can be put on display. In this picture I have a few candlesticks that i picked up at garage sales, the tombstone I got last year after Halloween, and the Sklamingos Erin gave me for my birthday one year.
The bird cage was left over from my wedding and I never thought I would use it again. I plan to alter the cage somehow so it doesn't look so pretty and new. The inspiration for this was from
here.
I've been wanting to make a display outside with straw bales and this year I finally am!
This box is full of items that won't come out until it's time to decorate for the party. Lots of creepy cloth, skulls and miscellaneous props. I also scored the Ouija game at Goodwill! I don't think they sell that game anymore.
This entire box of candles/tea lights are going outside on the porch, driveway and sidewalk.
I splurged on this piece at Hobby Lobby, but I did get 40% off. I wanted it for
this piece.
These dolls from Goodwill and St. Vincent de Paul will never look the same again. Inspiration/plans
here,
here,
here (I can't link to original post because the blog is for invited readers only),
here, and
here.
I'm thinking of aging and creepifying these curtains I found at St. Vincent de Paul. We'll see...
I ordered some other glasses, but Adam's mom gave us four of these tumblers last year. And I found these candy cigarettes while up in Door County with Erin. How absurd!
These jars that I purchased several years ago for canning will actually be turned into lanterns from
this tutorial here. The guy is annoying, but I love the look and it looks pretty simple!
This picture isn't the greatest, but I'm going to cover the couches with white sheets like an abandoned mansion.
I got this sign last year on clearance after Halloween. I don't like the wording, so I taped off the edge and spray painted away the message with a matte black. I haven't decided yet what I am going to put there...
That's all for now. It's late and I need my beauty rest so I can have loads of energy for more crafting tomorrow!
stuff stuff
stuff