Sunday, September 29, 2013

In the Making: Cauldron

This post took entirely too long and it's way past bedtime so I'm not going to proofread it. Forgive me.
 
-------
 
I've been mostly working on the cauldron as my first project. I thought it would take up the most time and it was the number one project that I wanted to have done out of the entire event. I've run into some hiccups, but have overcome the challenges successfully. Hurrah!
 
First of all I had to read the tutorials. A lot. And then some more. And then I searched for more tutorials. The first guy that started everything was ScareFX. His cauldron was great, as you can see from the link. He even made an entire witch and a stick that "stirred" the liquid inside the cauldron. Hard core!
 
I also found some other tutorials:
 
The Mad Lab - this guy had good pictures and pretty good instructions. Unfortunately, because of this, I followed the beginning part of his tutorial and it created my first hiccup... and to me it was a pretty major hiccup.
 
Kammoslair - his tutorial is ok. His pictures are tiny, and his grammar and use of punctuation is terrible... therefore was hard for me to understand and read. I also used part of this guy's instructions as far as adhering goes, and it was a total disaster and waste of time. I probably didn't read it right, but that's what I'm saying about his instructions... hard to read, hard to follow, and you can't even see the pictures unless you individually click on each one. UGH!
 
And I found some pictures of other's cauldrons, also based off of ScareFX's original work:
Unpleasantries.
Hellrazor
Amyrosalina78
Spider Rider
Francois Guay

-------
 
A day or two after I officially decided I was going to do the cauldron, I started looking on Craig's List for someone nearby selling or giving away a 55 gallon barrel. Most people were either giving them away or selling them for $10, which would be great, but most lived at least an hour away. Totally not worth it. However I did find this guy just a few minutes away from Adam's work that was selling LOTS of all different colors (of course I bought a black one) for $15! It was a little more expensive, but I saved more than that with gas money since Adam was willing to pick it up right after work that day. He even cut the barrel to the size I wanted!
 
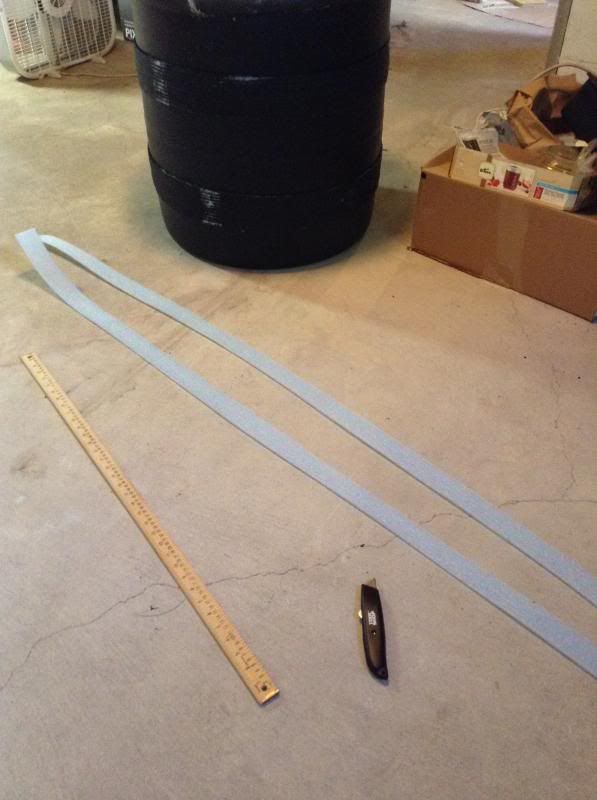
Of the supplies I needed, all I had to buy was some sill seal, liquid glue (total waste of money), and some pipe insulation.... all for $15 at Lowe's. I bought some other things from Amazon, like Styrofoam pieces, but I'm not going to end up using those.
 
As directed, I attached the pipe insulation to the rim. Problem number one: it didn't quite fit. It was just a tiiiiiiny bit too small and was a pain in the butt to adhere. Kammoslair said he used liquid nails. Later I re-read his tutorial 10 times and found out that he used the stuff for a different part of the process.... and on this part he used Super 77 Spray Adhesive or something. Whatever it is, it's like $8 for a can at Walmart and I'm too cheap to buy that. I have 20 different adhesives already and I'd be damned if I couldn't find one that worked!


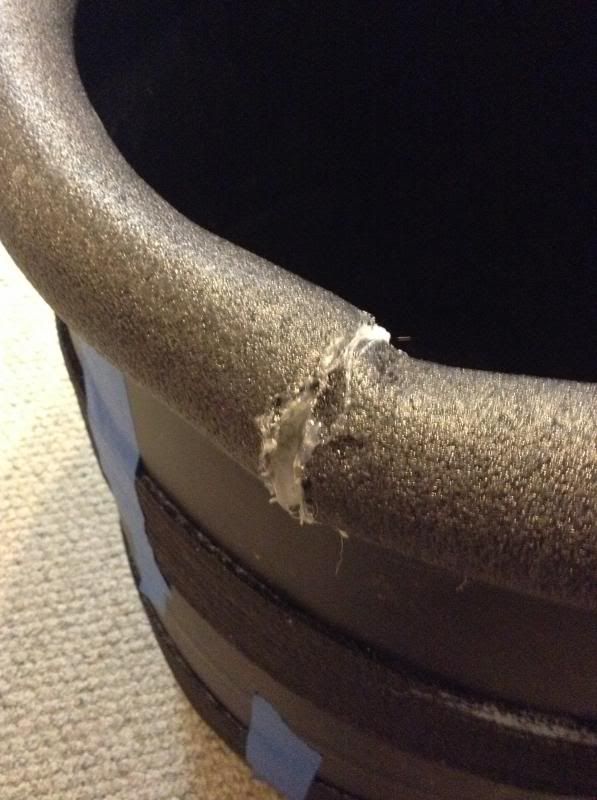
According to The Mad Lab, hot glue was the answer to attach Styrofoam to the drum. Cool. Look at my work. Fabulous. I still have this eyesore and have an idea of what I'm going to do to cover it.
 
Next, I did what The Mad Lab suggested - painted the sill seal with black acrylic paint. I already had this, so that saved me a whole dollar. Woo hoo.
 
BAD. BAD, BAD, BAD. If you ever decide to make this cauldron, do not bother with this step! Not only did this crappy acrylic paint from Walmart (apparently the same stuff he used) flew right off like it was in a tornado when touched by a fly. Seriously, it was such a waste. Not even that, but later it posed another problem which I'll get to in a minute.
 
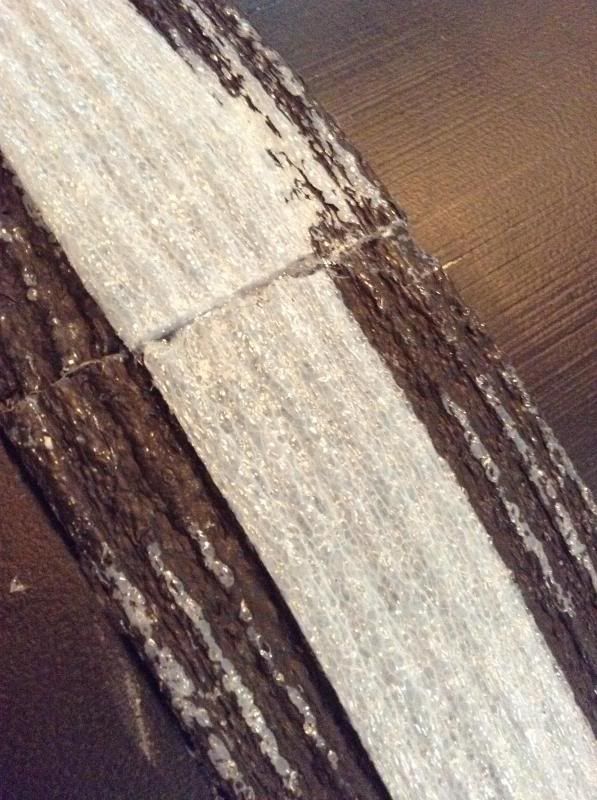
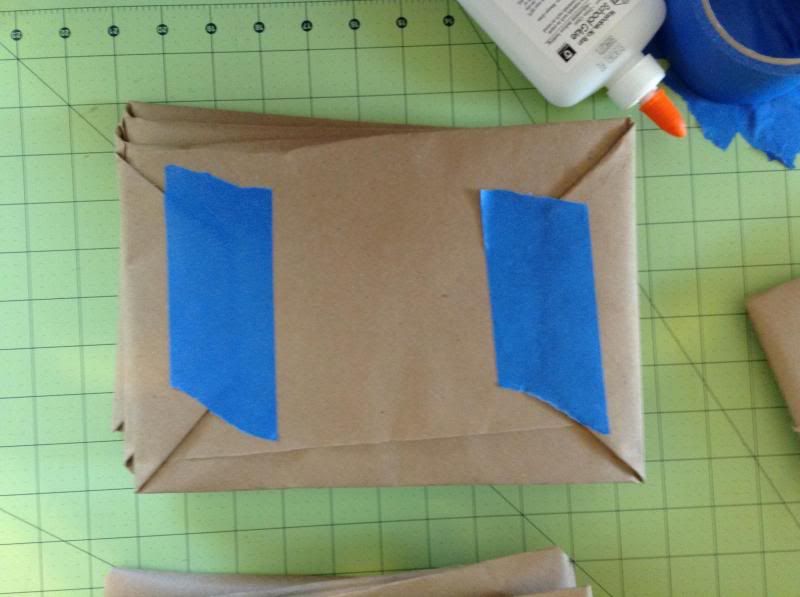
Once I wasted my time with painting the sill seal, and before I knew that was a bad idea, I attempted to attach the seal to the drum with liquid nails. I thought that stuff dried faster, but I put painter's tape over it overnight just to make sure it stayed in place.

The next day, about 24 hours later:


Still wet. Not holding a thing. On top of that, when I took off the painter's tape:


What the fudge?


The paint ripped right off just like I told you before. What. A. Waste.
 
I researched how to adhere Styrofoam, and found that hot glue was the way to go. That entire night I used hot glue to re-attach what I "already did" the night before.
 
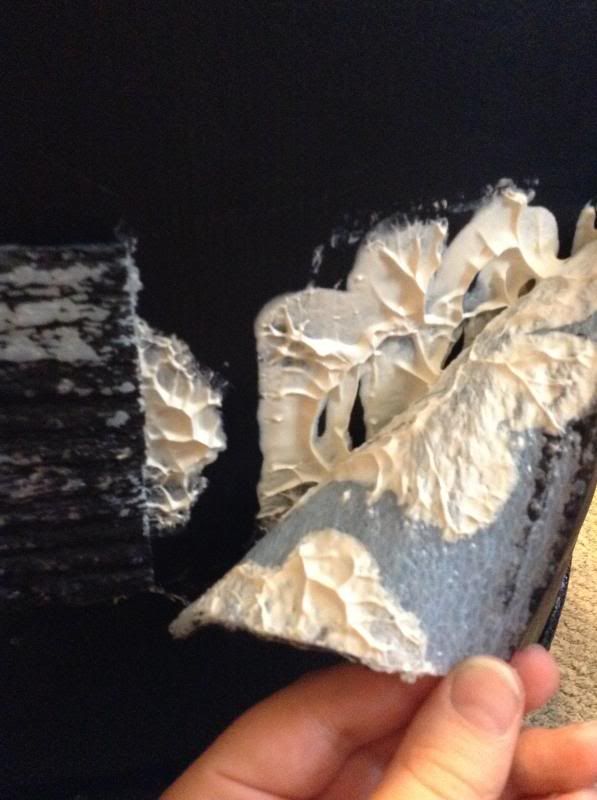
The next issue I had was the fact that everyone's cauldron looked weird. Nearly all of them had these gigantic balls around the sill seal. I've never seen a cauldron like that. Not in a movie, not a plastic store bought one, not in my head... I have no idea where all these guys thought this up.


Over the last week I've been doing a lot of research on witchcraft supplies and have found no cauldrons that look anything like this. Not at all. The only thing that might resemble it is ONE pentagram on the front.
 
Since I didn't like the look, I decided to base mine off of an actual cauldron at a wiccan store:

Amazon.com

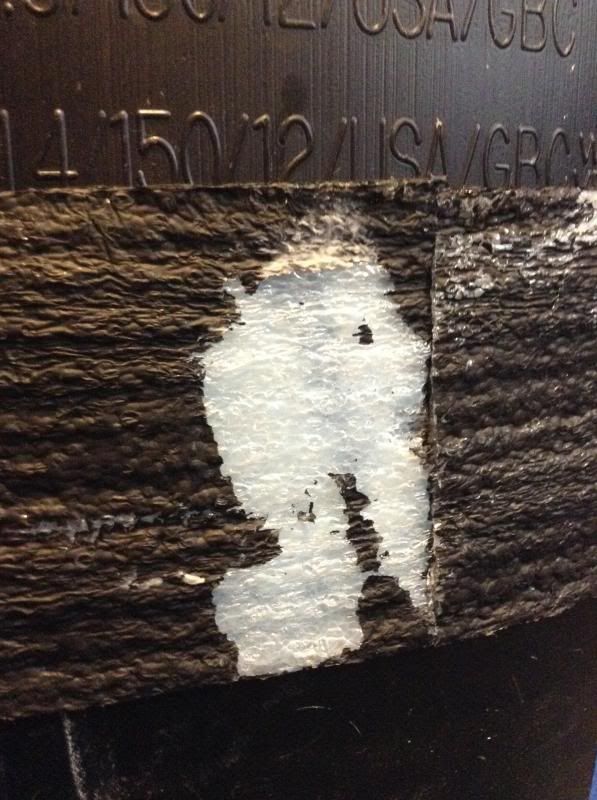
I cut the sill seal in half and attached it on top of the seal that was already glued down.


This is where the next problem came in with the STUPID pre-painting of the seal. The glue stuck to the paint, which of course came right off, because the paint didn't even stick to the seal! AHHH! So I glued the seal, pressed it down, and the glue would attach to the paint and it would just come right up. So I had to glue it down twice. Awesome. Sweet. Best. Idea. Evar.
 
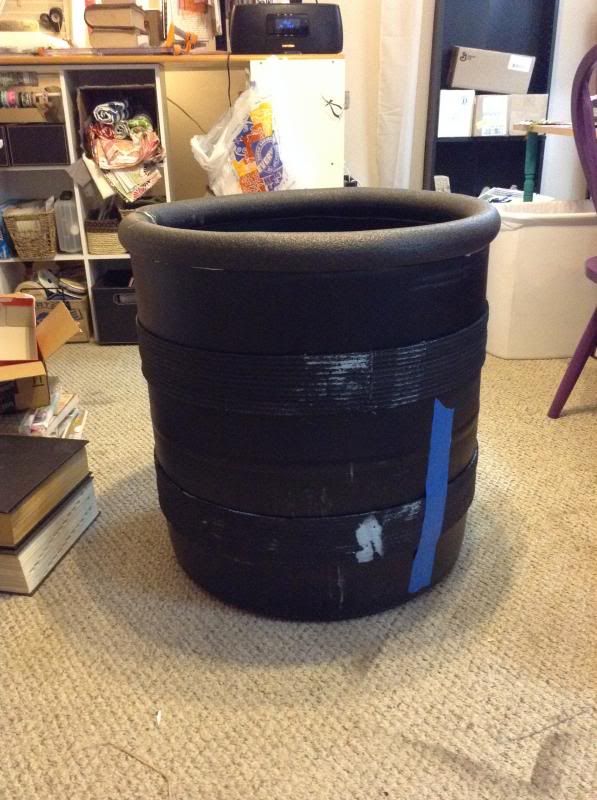
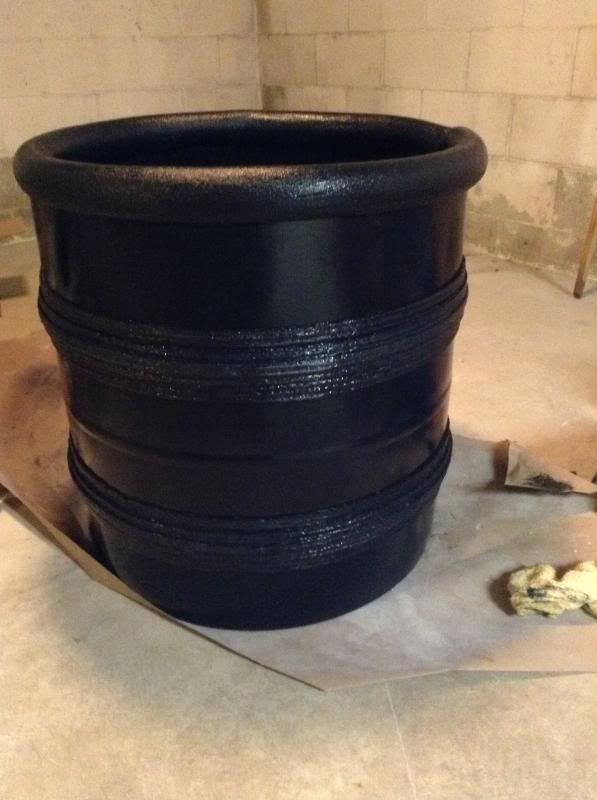
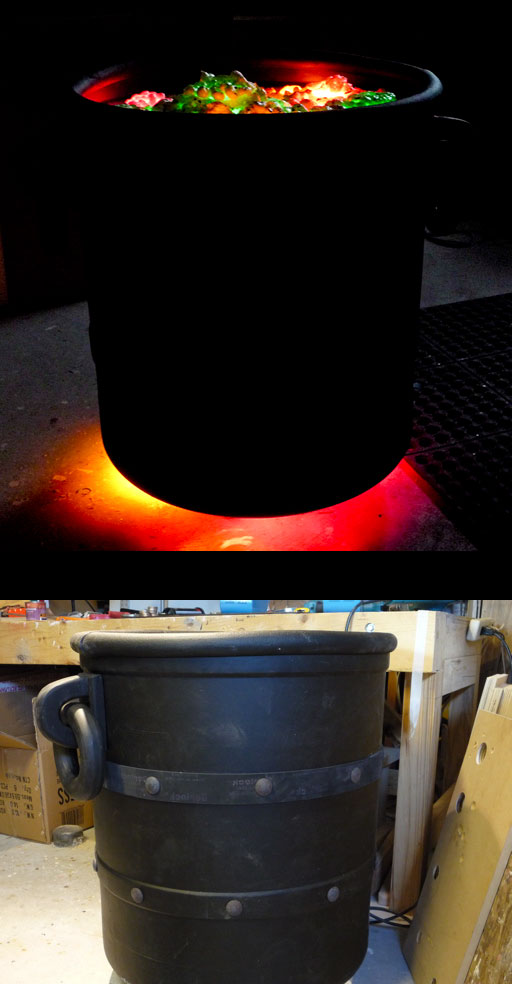
Once that problem was fixed, I decided that having the two bands just wasn't enough. So I added a third band, another size smaller.


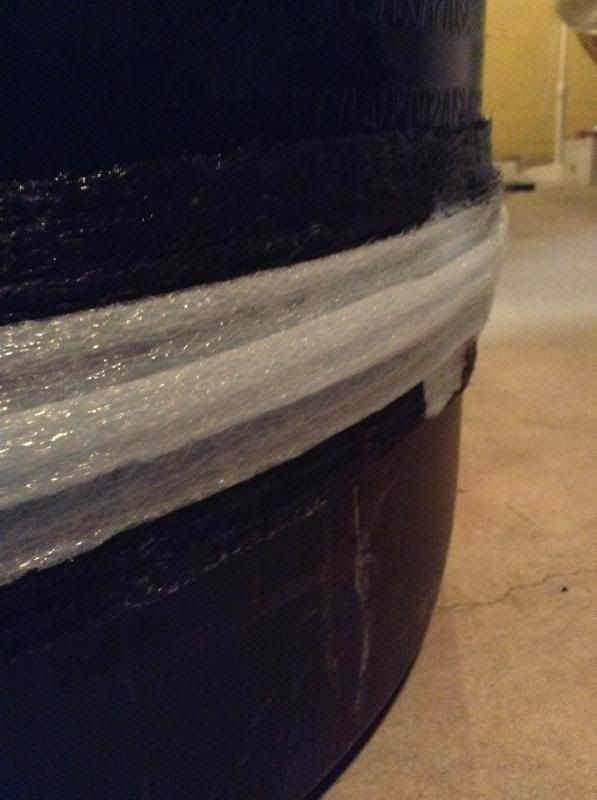
You can't really see the first layer because I already painted it black before I remembered to take a picture.
 
That part went off without a hitch. FINALLY something that went right.
 
Next was painting. I did a bit of research to make sure that the leftover acrylic latex paint I used for my baseboards wouldn't eat the Styrofoam, and someone said they use it and it works great. Away I went. If something went wrong, I didn't care and I know exactly what I need to do THE FIRST TIME without stupid instructions.


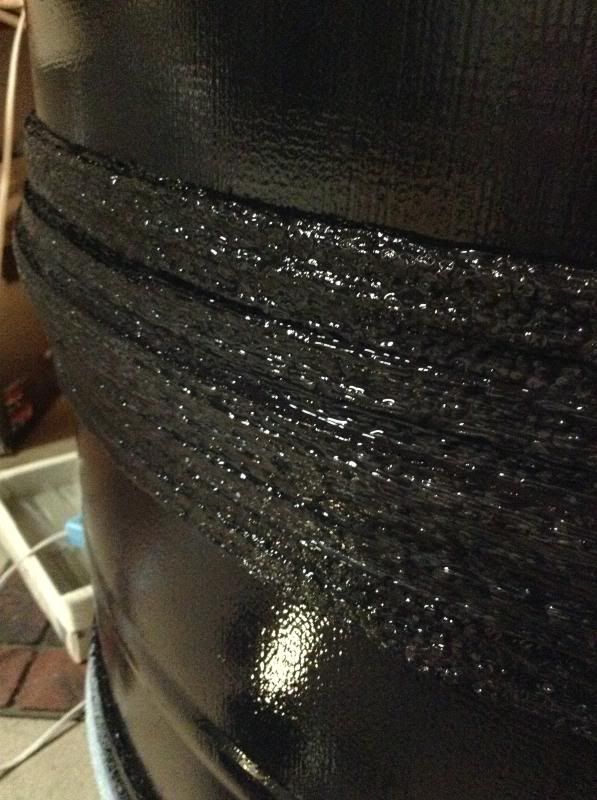
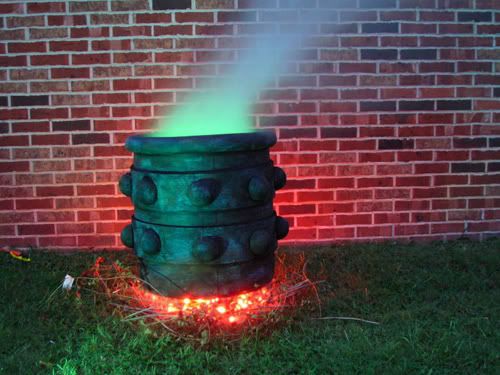
It's perfect! You can't see the layers all that well, but I think it looks a million times better than gigantic boobs popping out everywhere. I'll be painting it again with a matte black (this black has a satin sheen), and then I'll detail it with copper accents or something so hopefully the layers pop out more.


So that's where I am.

I left out the other frustrating part about the "hardware": the part that everyone made to attach the handles to the cauldron which attached to the chain. First of all, NO ONE EVER gave dimensions of what to cut the pink foam to. What am I supposed to do? Guess? Seriously? Why even bother making a tutorial? So what did I do? I guessed. Luckily our friend, Matt, had some extra pink foam he let me have. I don't have a proper knife to cut it with, so I tried a box cutter. It got about halfway through the foam but definitely didn't make the cut. The only other thing other than a kitchen knife was a drywall saw thing, which is jagged and flexible. Not ideal.
 
I cut some pieces out and tried to eyeball it and omg it was just such a mess. Pink foam was everywhere. Then I cut myself with that stupid blade. Ugh. That was it. I was done. No more hardware. I was going to figure out another way.
 
I think Erin thought of the solution. I'm going to see about it tomorrow. Cross your fingers for me that it does!!! I think that bad tutorials galore have caused me enough pain for just one project!!!

What's sick is that I still have enjoyed this project. What am I, a masochist?

Tuesday, September 17, 2013

Learning.

The Tandem Skydiving album has taught me a lot.
  • Modern is fun!
Honestly, the only reason this book is modern (as opposed to grunge/aged/antiqued/weathered/Tim Holtz'ed) is because I found a fabulous page kit called Everyday Eclectic by Echo Park and just.had.to.have.it.

http://www.damasklove.com/whats-your-monogrammable/


  • Modern is hard!
Other than that page kit, I have nothing modern. No embellishments, no paper, no inspiration. My friend Kelsi gave me some modern washi tape several weeks ago. Other than that, most of my embellishments I consider to be more Tim Holtz style. (Probably because most of them are Tim Holtz brand...) I had to buy some more things that were appropriate, and I was able to just get two paper pads and used what I already have for everything else. I'm pretty proud of that! It's really, really hard for me to not spend money.

http://laurafadora.wordpress.com/2013/08/26/big-news/


  • My Silhouette is awesome!
Although for the first several days after I got it I absolutely hated it and wanted to throw it out of the window, I'm finally starting to really love my Silhouette. I've ruined countless pieces of paper but have learned a LOT in the process and I've cut a LOT of cool things. All of my cuts were either free, ones I made (I made like... one...), and only one I purchased for 99 cents plus the Designer Edition software ($32ish) from svgcuts.com that came with a $10.00 gift card. I've made a lot of embellishments and backgrounds with it. Just about every page has something that was cut with the Silhouette.

http://www.silhouetteamerica.com/


  • It's ok to "scrap" it.
Adam loves puns. It's only appropriate that I add one.

Many times when I'm making my layout and I'm moving things around to make it work, I've learned to just sweep it all off the page, put everything away except the picture, and start over. If something doesn't look right, then it isn't right. Don't force yourself to like something that sucks. Or even if it's just "ok", toss it and start anew.

http://pinterest.com/pin/93238654754914023/
Makes me laugh every time.


  • Plagiarize. Everyone does it. I prefer to call it CASEing.
True story. There's a saying that someone said once upon a time that I'll summarize: "Nothing is original." Ideas are built off of other ideas. I don't feel bad about nearly copying another layout because, really, it's a compliment. If someone liked MY project so much that they want to do something nearly identical, I would be thrilled! Someone actually LIKES something of mine that much!?

http://markmalazarte.com/jarmusch/


Even if I never look at the album again, I still grew artistically from it, and even finishing it is accomplishment in and of itself.

Saturday, September 14, 2013

Update. House. Couch. Win. & Halloween.

Honestly I've written a few posts about my skydiving album and I've taken all of the pictures, but I wanted to proof read them before I post them. I haven't been able to proof read them because SO many things have been happening.
  1. First, we're getting a whole new house. Well, outside of the house. A hail storm about three months ago ruined our roof, siding, deck, garage, screen doors and fence. We finally got word this week, after weeks and weeks of patience, that nearly EVERYTHING has been approved to be redone. That means we are getting it all fixed up: new VINYL siding (we have aluminum... we've chosen a dark grey with white gutters, fascia, trim, whatever), new roofs on the house and garage, a newly stained deck and fence (totes worth the money; I never want to stain again), and a few new screens on the doors and some windows. 

    There were a few things that aren't covered, like some paint here and there, along the bottom concrete foundation, the fascia, etc, which we may or may not have to pay out of pocket for. We have a few hundred dollars coming in from three referrals. Our contractors, because we are giving them so much business, were going to try to cover the garage in vinyl with all the money from the insurance, but I'd rather have them put extra money into the paint that needs to be done on the house itself. They're really trying to hook us up to make it so we pay NOTHING out of pocket... not even our deductible.

    Anyway, lots and lots and lots happening with that and I'm super excited. We should get the new roof next week!

  2. Second, we had to get a new couch and we got a new coffee table with it. Yes, we felt we NEEDED it. Since we moved in together, we've had these 15 or 20 year old couches as a hand me down from Adam's mom. They worked, but honestly they were ugly, outdated, and Nuke tore some of the cushions when he had claws. But we've dealt with them, no big deal, because we knew we'd replace them someday when we had more money.

    Several months ago, Matt, our friend, sat on the love seat and broke the front leg. Adam Jimmy-rigged it and used some scrap wood to use as a fake leg. It worked until about a month ago when we tried to move the couch (long story) and it broke off. The couch had been sitting around on three legs (I should've taken a picture. It was absolutely ridiculous) before I finally talked Adam into going to look at the furniture store in town, WG&R.

    We just so happened to fall in love with a BEAUTIFUL couch in the clearance section for like 50% off. Then I found a gorgeous coffee table for 20% off, but not in the clearance section. They were delivered last Friday! We had to re-arrange the living room so it would all fit and we love it! There's SO much space.

    Bad lighting
    View from the kitchen/dining room/hallway area

    From the front entry

    Nuke LOVES all the space near the windows!
    You should see how gross the windows are from his nose marks :)

    I'm not sure how I feel about this little setup with my off-the-curb chair, but I THINK it works?

    Detail of the coffee table. It's totally "Tessa".

    Nice leather! It had a red/brown tint to it that you can see in certain light,
    but it's so dark it looks black.

  3. Also.... I won something!! And not just anything... a HUGE something! An ENTIRE COLLECTION! To people that don't understand what that means: that means tons and tons of product for paper crafting. 

    Check this link out to see that my awesome comment won ALL THIS JUNK!!!!:
  4. I don't know why #4 is here? I can't get it to go away. I hate Blogger sometimes.


    And that's just SOME of the things I won. There's a bunch more that I didn't include because this post is long enough.

  5. {inspiration photos and projects that I'm taking on this year}


So you can see why I haven't been blogging. But it's nice to journal all of this in once place and get it all down. I haven't been project Life-ing because of the same reason. I have a lot to catch up on!

Friday, September 13, 2013

Invitations.


I wrote all about these invitations in another post which I'll post tomorrow, but because it's so lengthy and because I'm so excited about them, I thought they deserve their own post.

These invitations are spectacular, as you'll see in a minute. My mother is going to FLIP (not in a good way) when she sees these. Hopefully she won't check my blog :)

As ya'll know, I'm big into my annual Halloween party. There's always a ton of projects that I take on, a ton of decorations, and always gross food (never any normal looking food). This year, because money is so tight, I'm going for the simple but big effect: huge creepy cloth across every ceiling, long, beat up and dirty drapes on every window, and hopefully drapes in every doorway. We're inviting the usual amount, which actually equates to 16 invitations total, not including any extra that I want to make for myself!

I'm telling and showing you all of this because none of my RL friends read my blog. If anyone that reads this were coming, I wouldn't post anything until after the party or after everyone received them.

Here are several pictures of my invitations and here's where my mother is going to freak out:


Ouija boards! Our address and telephone are on the bottom which I covered up. Now, I'm not one to normally like things like this. I strongly believe in God, but for a Halloween party I go all out. I go scary, I go creepy, I go gross. When more money allows, I will go terrifying. As far as these invitations go, I hope they will make people uncomfortable! Ha! I love them and they turned out exactly the way I imagined in my head! 

The graphic was Erin's job... she did all of this herself. I found the font for her and she did the rest. How AMAZING is she!? 

This was not an original idea. I got the idea from Pinterest, and you can see many different versions here.  But they all look lame IMHO. Maybe not lame, but in comparison to Erin's skills, they look totally subpar if you ask me.

I didn't just want a white piece of paper as the invitation, I wanted an actual board game. I found a FABULOUS tutorial here: How To Make a Retail-Worthy Quarter-Fold Board Game on BoardGameGeek.com.  I used chipboard and black contact paper, then rubber cement to glue the graphic to the chipboard. 

Part of Step One of the making process

The back side and front side

I wanted a Planchette to go along with the Ouija board to give the full effect. It just didn't seem complete to just throw a mini board game in an envelope without the entire game. It's like using a Monopoly board without Monopoly money. Just weird!

So I looked and looked and couldn't find any place that even sold Ouija boards for a fair price, let alone the planchettes alone. Eventually I found a guy on Etsy who makes them and would custom-make mini sized ones to the size of my board!

Planchettes!

They totally rock my socks off and DO fit perfectly with the board.

The Etsy guy was amazing. He responded immediately to my initial request and all contact I made thereafter. You can see he makes some really cool and beautiful stuff. I ordered the pieces on a Friday night, and he had them finished and in the mail on the following Monday. He made a few extra in case some of them didn't turn out, so he gave me the extras... FOUR extras! AND, on top of all of THAT, he threw in a completely cool gift:


A full size Ouija board and full sized planchette! I seriously thought he made a mistake by putting it in the same box as mine, but it turns out:

When he said "being a good sport about paying",
he's talking about how I wanted to pay half now, and then pay half once the order was received.
But there's isn't an option of doing that with Etsy, so I just paid him all up front. 

How. Awesome. Is. That?? Just, so awesome, that's how awesome. I don't think I'll ever use it, but it'll be a great display with my apothecary!

If I EVER need any wood pieces anywhere similar to this, I'm going to him. If anyone else asks me about where to get something like this, I'm sending them straight to him.

See how they all came together once I added either regular cheesecloth (left), spider web (right), or aged cheesecloth (center)? They held the planchettes in place really nice. 


Regular Cheesecloth (Erin's Idea)

Fake Spider Webs (Adam's idea)

Tea-Stained Cheesecloth (my rendition)
But I couldn't stop there. No. I couldn't just put these sick invitations into a yellow bubble envelope and send them on their way. I had to make them truly awesome from board to stamp.

I spent most of the day yesterday making worthy mailing labels. That's right, I couldn't just write on the package. I couldn't just type up names and addresses on a label. They had to be AWESOME labels. Some I am going to hand deliver, so I didn't need an address.


I hand cut every one of them because none of them were exactly the same size as the labels themselves. I'm very pleased with how they turned out. Definitely worth the time if you ask me. 

But again, I couldn't just put them in a yellow Scotch bubble envelope. So I covered the envelopes in butcher paper and tied them with string. 


I found that spray adhesive worked the best to get the paper attached to the envelope. 


After that dried, I used Elmer's Glue to adhere the outside flaps like wrapping a present. I put some painter's tape on the flaps while they dried. 


And... the final result! 


**NOTE: You cannot send a package wrapped in twine in the mail. I only mailed three of the invitations, the rest I had delivered or had Adam hand deliver.


Final thoughts:

I thought that this would be a fairly easy and simple project. I thought Erin's part would take about two days, then it would take only an evening (about 4 hours) to complete my part. HA! I spent four evenings plus my lunches on these babies, plus whatever time I may or may not have spent during work hours...   >.>

If I had to do it over, the only thing that I think I might change is making it a folding board, kind of like this:


I think it looks more fancy. But that's also a lot more work.

Now for my other Halloween projects... *sigh*